PRTG viene con un clúster de conmutación por error integrado para el monitoreo de alta disponibilidad. Un clúster de conmutación por error consiste en dos instalaciones separadas del servidor central PRTG, donde un servidor actúa como nodo maestro y otro como nodo de conmutación por error.
PRTG incluye un único clúster de conmutación por error con cada licencia, independientemente de si utiliza la edición gratuita o cualquier edición comercial de PRTG Network Monitor. La función de clúster no está disponible en PRTG Hosted Monitor.
En esta guía, le mostramos cómo puede configurar un clúster de conmutación por error en 6 pasos.
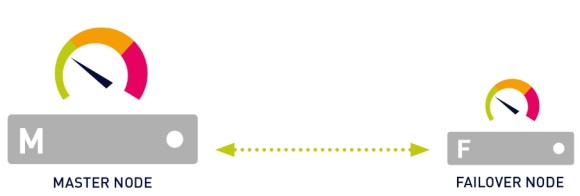
Antes de configurar su clúster, debe tener en cuenta los siguientes requisitos:
Para obtener requisitos más detallados e información en profundidad, consulte el Manual de PRTG: Configuración del clúster de conmutación por error.
Obtenga visibilidad total con paneles en tiempo real, alertas y sensores personalizables
Elija cuál de sus servidores centrales PRTG actuará como nodo maestro del clúster. Si usted tiene una instalación de PRTG que ha estado funcionando durante algún tiempo, haga de este servidor central PRTG su nodo maestro para mantener su configuración de monitoreo.
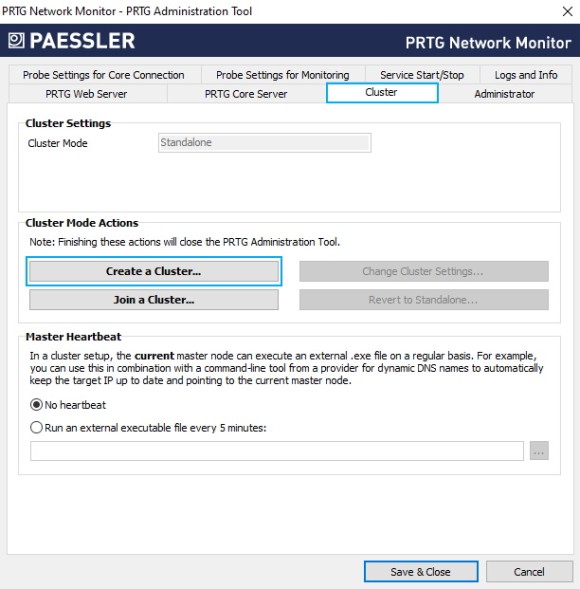
6. Haga clic en Crear un clúster y confirme el mensaje de advertencia con Sí.

7. Introduzca un puerto de clúster o deje el valor por defecto. El puerto debe estar abierto tanto en el nodo maestro como en el nodo de conmutación por error.
8. Introduzca una clave de acceso al clúster o deje el valor por defecto. La clave de acceso al clúster debe ser única. Ambos nodos de clúster deben utilizar la misma clave de acceso al clúster.
9. Guarde la clave de acceso al clúster para su uso posterior.
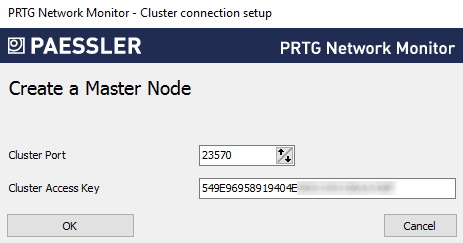
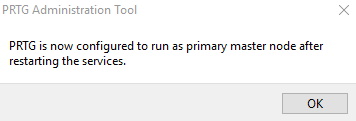
10. Haga clic en Aceptar y confirme el mensaje que aparece con OK para reiniciar los servicios de Windows y convertir el servidor central PRTG para que actúe como nodo maestro del clúster.
Una vez que haya configurado el nodo maestro, deberá configurar también el nodo de conmutación por error.
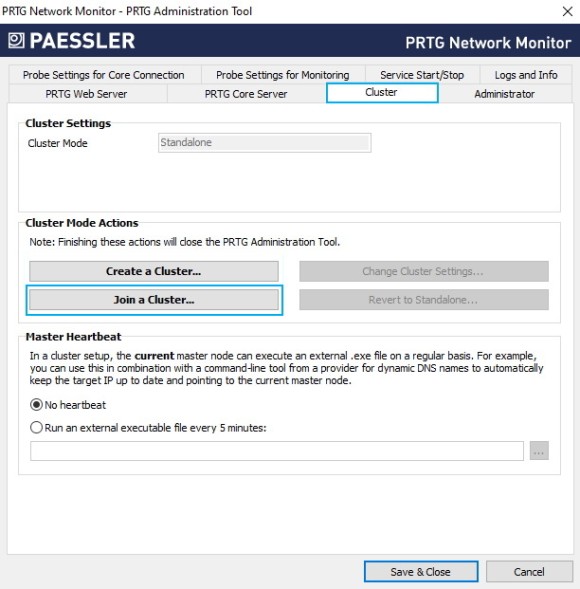
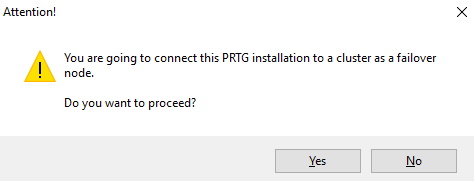
6. Haga clic en Unirse a un clúster y confirme el mensaje de advertencia con Sí.
7. En Nodo maestro (dirección IP/nombre DNS), introduzca la dirección IP o el nombre DNS del nodo maestro que configuró anteriormente.
8. Asegúrese de que el Puerto de clúster coincide con el puerto que configuró previamente para el nodo maestro.
9. Introduzca o pegue la Clave de Acceso al Clúster que configuró previamente para el nodo maestro.
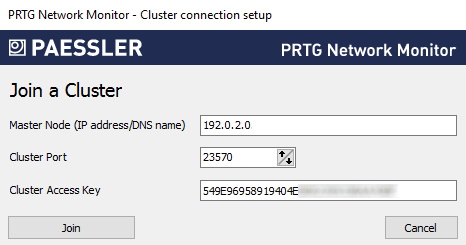
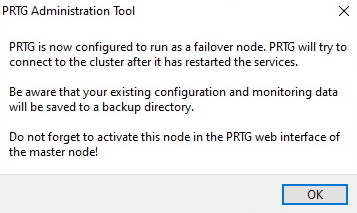
10. Haga clic en Join y confirme el mensaje que aparece con OK para reiniciar los servicios de Windows y convertir el servidor central PRTG para que actúe como el nodo de conmutación por error del clúster.
Ahora que ha configurado el nodo maestro y el nodo de conmutación por error, debe confirmar el nodo de conmutación por error estableciéndolo en el estado Activo en la configuración del nodo maestro.

Asegúrese de que el nodo maestro y el nodo de conmutación por error están conectados comprobando el estado del clúster.
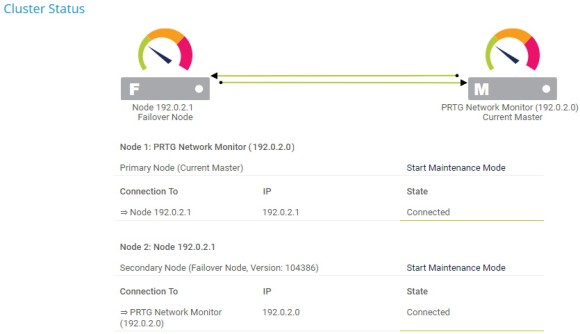
Si los dos nodos de clúster tienen problemas de conexión, compruebe los siguientes archivos de registro para cualquier mensaje de error relacionado:
Asegúrese también de que ningún cortafuegos bloquea la conexión entre el nodo maestro y el nodo de conmutación por error a través del puerto de clúster especificado en ambos lados. Si es necesario, defina reglas NAT para su red. Vea también Cómo conectar PRTG a través de un firewall en 4 pasos.

Las alertas personalizadas y la visualización de datos le permiten identificar y prevenir rápidamente todo tipo de problemas
Después de configurar el clúster de conmutación por error, debe mover sus objetos de monitoreo de la sonda local a la sonda de clúster. Esto es necesario porque PRTG sólo puede monitorear objetos que se encuentran en la sonda de clúster a través de todos los nodos de clúster.
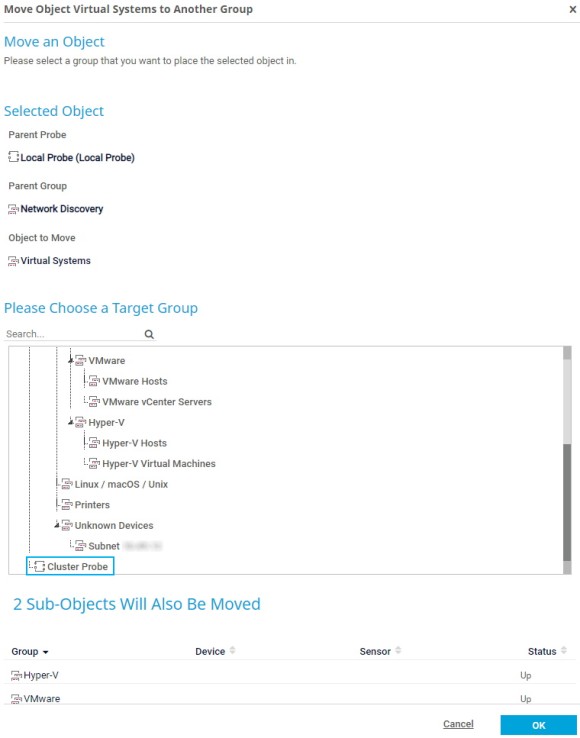
PRTG transfiere automáticamente mapas y archivos de búsqueda personalizados al nodo de conmutación por error cuando se inicia el nodo maestro. Sin embargo, debe volver a cargar manualmente los archivos de búsqueda personalizados tanto en el nodo maestro como en el nodo de conmutación por error. Consulte también nuestra guía Cómo trabajar con búsquedas en PRTG.
Además, debe copiar manualmente otros archivos personalizados de las siguientes subcarpetas del directorio del programa PRTG en el nodo maestro a las respectivas subcarpetas del directorio del programa PRTG en el nodo de conmutación por error:
Puede añadir más nodos de conmutación por error al clúster en cualquier momento. Tenga en cuenta, sin embargo, que necesita una clave de licencia adicional si desea ejecutar dos o tres nodos de conmutación por error, y dos claves de licencia adicionales si desea ejecutar cuatro nodos de conmutación por error.
En total, un clúster de conmutación por error puede constar de un máximo de 5 nodos de clúster: un nodo maestro y hasta cuatro nodos de conmutación por error.
Tenga en cuenta también las consideraciones de rendimiento mencionadas al principio de esta guía práctica.