![]()
How to connect PRTG
through a firewall in 4 steps
Access to the PRTG core server from outside
You have set up PRTG in your internal network with your private IP address, for example, 192.168.0.100. Everything is working fine, but now you also want to be able to reach your PRTG core server via the internet from a different system than where your PRTG installation is running. For mobile network monitoring, you want to use the PRTG apps for iOS or Android as well.
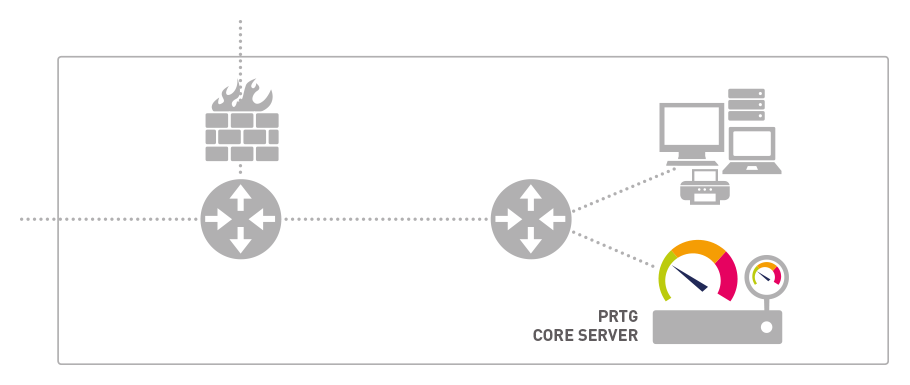
Before you can do this, however, you need to make sure that your PRTG core server can be accessed from the outside world and also through your firewall.
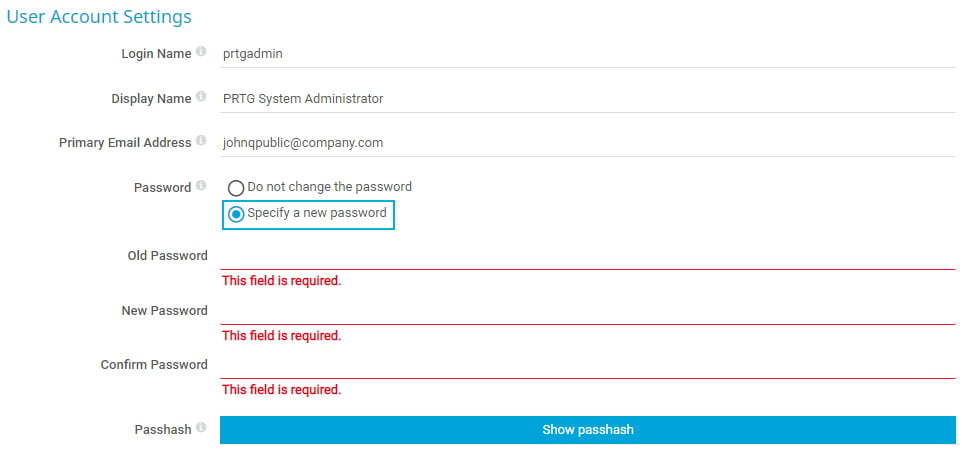
Because security comes first, you need to make sure that no one else is able to log in to your PRTG installation. To do so, you need to change the password for the PRTG System Administrator user account (this is prtgadmin by default) if you have not done so yet.
To check if you are still using the default password, simply select Setup | Account Settings | My Account from the main menu in the PRTG web interface and go to section User Account Settings. If the Login Name and Password fields are prefilled with prtgadmin, click Specify a new password to change the password accordingly.
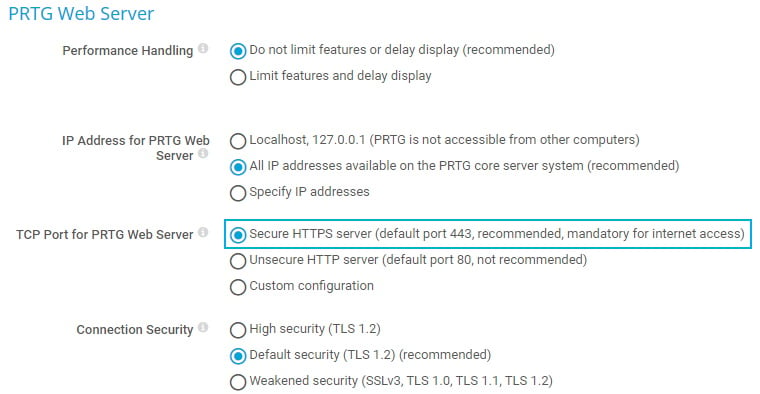
Then, because you do not want to access your PRTG installation over the internet using insecure HTTP, you need to make sure that you configure PRTG to use HTTPS for all connections to the PRTG web interface. HTTP is also possible but we do not recommend it.
To do so, go to Setup | System Administration | User Interface, section PRTG Web Server, and select Secure HTTPS server as Transmission Control Protocol (TCP) port for incoming web page requests.
Get an SSL Certificate
PRTG comes with an SSL certificate that is self-signed. If you configured the PRTG web server to use HTTPS, your browser shows a certificate warning when you access the PRTG web interface. To remove this warning, you need to get your own trusted certificate from a certificate authority (CA). For more information, see Using your own SSL Certificate with the PRTG Web Server in the PRTG Manual.
To access your PRTG installation from the outside, you need to open or forward the necessary ports in your firewall. The solution is to make Network Access Translation (NAT) rules for these ports.
Specifying NAT rules in your firewall can quite differ, depending on the vendor you use. Therefore, check the according documentation that comes with your device or model.
In our example, with PRTG running on a server with the IP address 192.168.0.100, the NAT rules could look something like this:
| Rule | Source IP (WAN) | Source Port (WAN) | Destination IP (LAN) | Destination Port (LAN) | Protocol |
|---|---|---|---|---|---|
| HTTP PRTG | 0.0.0.0 | 80 | 192.168.0.100 | 80 | TCP |
| HTTPS PRTG | 0.0.0.0 | 443 | 192.168.0.100 | 443 | TCP |
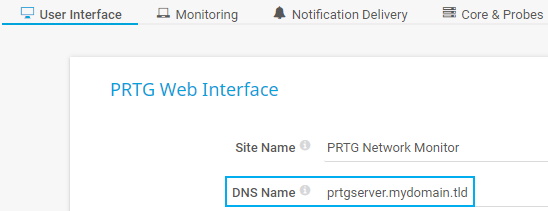
The rule for HTTP is optional but makes things a lot easier. If you type prtgserver.mydomain.tld in your browser, it will first try to reach the website using HTTP. Note that if you do not want to create the NAT rule for HTTP, you must type https://prtgserver.mydomain.tld each time instead.
Also make sure that your Windows Firewall is either disabled on the PRTG core server or that you created the relevant rules.
And that’s it! You can now monitor your PRTG installation while on the go with the PRTG apps for iOS or Android or access the PRTG web interface from other clients via the internet.
If you decide to install one or more classic remote probes (see our how-to guide) outside of your LAN to monitor your network from different locations, these remote probes initiate the connection to the PRTG core server.
This is the reason why you need to allow the PRTG core server to accept incoming remote probe connections.
In your PRTG installation, go to Setup | System Administration | Core & Probes. In section Probe Connection Settings, select All IP addresses available on this computer to specify that the server accepts all IP addresses for incoming probe connections.
For Allow IP addresses, enter the IP addresses of the clients that you want to install your remote probes on, or enter any to allow any IP address.
You also need to allow your remote probes to communicate through your Windows Firewall. The steps to take can quite differ.
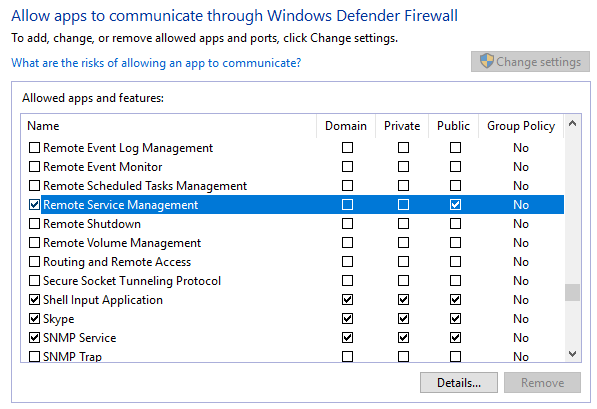
Here is an example for Windows 10:
In your Windows Defender Firewall settings, click Allow an app through firewall. In the window that opens, click Change settings. Tick the check boxes next to Remote Service Management and Public in the respective line. Click OK to save your settings.
Because the remote probes initiate the connection to the PRTG core server, you also need to open or forward the port that is used for connections with classic remote probes in your firewall. This is TCP port 23560 by default.
Create the following NAT rule:
| Rule | Source IP (WAN) | Source Port (WAN) | Destination IP (LAN) | Destination Port (LAN) | Protocol |
|---|---|---|---|---|---|
| Remote Probe PRTG | 0.0.0.0 | 23560 | 192.168.0.100 | 23560 | TCP |
Done! Now you can also use classic remote probes for monitoring remote locations, for example, your branch offices, without firewalls preventing the connections.
This how-to guide only scratches the surface?
Get more deep-dive information here!
