![]()
How to use your own SSL certificate
with the PRTG web server
PRTG supports connections to the PRTG web server via SSL/TLS to secure all data that you enter in the various PRTG user interfaces.
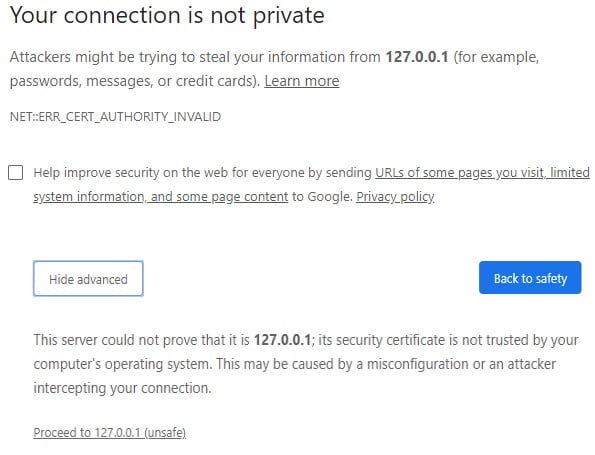
PRTG comes with an SSL certificate that you can use to secure your connections to the PRTG web server and access the PRTG web interface via HTTPS. Because the SSL certificate is a self-signed certificate, browsers show an SSL certificate warning when you try to open the PRTG web interface. This does not mean, however, that your connection is not secure. It just means that the certificate does not match the DNS name or IP address of your PRTG core server.
To remove the certificate warning in the browser, you can provide a trusted SSL certificate that matches the DNS name or IP address of your PRTG core server. The certificate must be signed by a valid certificate authority (CA), for example, DigiCert, GoDaddy, or InstantSSL.
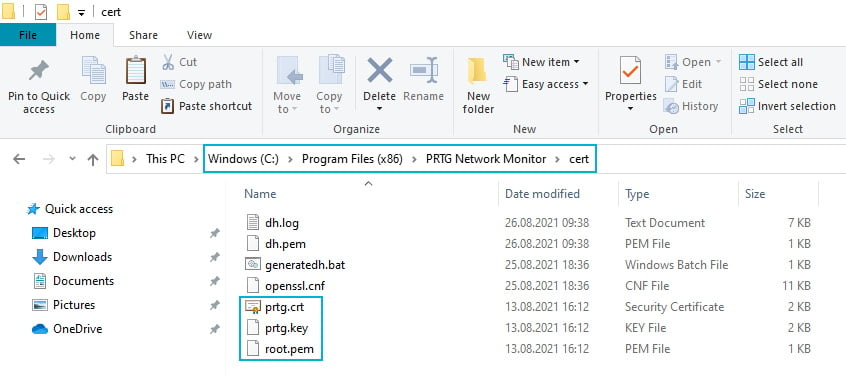
PRTG needs three different certificate files that must be correctly named and that must be available in PEM-encoded format.
- crt: This file is the certificate for the PRTG core server.
- key: This is the private key that matches the certificate for the PRTG core server. Make sure that you provide the private key without encryption.
To check that the file is not encrypted, open it in a text editor and search for the string ENCRYPTED. If the file contains this string, decrypt the file with an SSL tool, for example OpenSSL, and the key password. - pem: This file is the public root certificate of the certificate issuer. It must contain all your issuer’s required root certificates in one file. If there is more than one root certificate in .pem format, copy all files together in a single file. The order does not matter in this case.
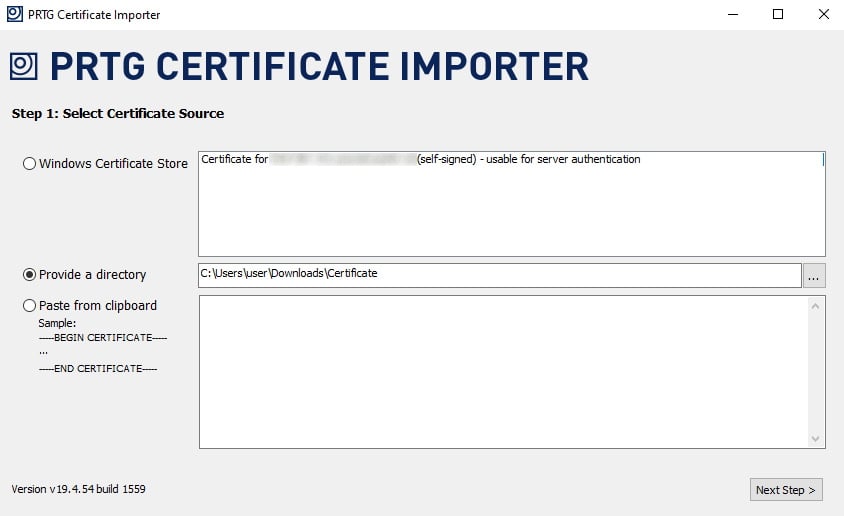
We recommend that you use the free tool PRTG Certificate Importer that you can download from our website. There, you also find step-by-step instructions on how to use the tool.
PRTG Certificate Importer does the following:
- It automatically decrypts the file with the private key in case the file is encrypted.
- It makes a backup of the default SSL certificates for PRTG and automatically creates and converts all certificate files that you need for PRTG out of the files that you get from the CA.
- It automatically stops and starts the PRTG core server service and saves all necessary certificate files in the correct subfolder on the PRTG core server system.
You can always import your certificate files manually, although we recommend that you use PRTG Certificate Importer.
- Make sure that you have backups of the default SSL certificates files that come with PRTG.
- In many cases, the CA provides you with a single file that contains several certificates and the respective private key. The file might end in *.chain.pem or similar.
- Open the file in a text editor.
- Copy one certificate into a new text file and save the file under the name crt. If there are several certificates, select the first certificate.
A certificate begins with
-----BEGIN CERTIFICATE-----
and ends with
-----END CERTIFICATE-----
- Copy the private key into a new text file and save the file under the name key.
A private key begins with
-----BEGIN RSA PRIVATE KEY-----
and ends with
-----END RSA PRIVATE KEY-----
Important: Make sure that you provide the private key without encryption. To decrypt the private key, take the following steps:
- Download an SSL converter tool, for example, OpenSSL.
- In the command line, run openssl rsa -in [encrypted-key].key -out prtg.key
- When the tool asks you to enter the PEM pass phrase, enter the password for the private key.
- Find the certificate issuer’s root certificate. In most cases, this is the last certificate listed before the private key. Copy the root certificate into a new text file and save the file under the name root.pem.
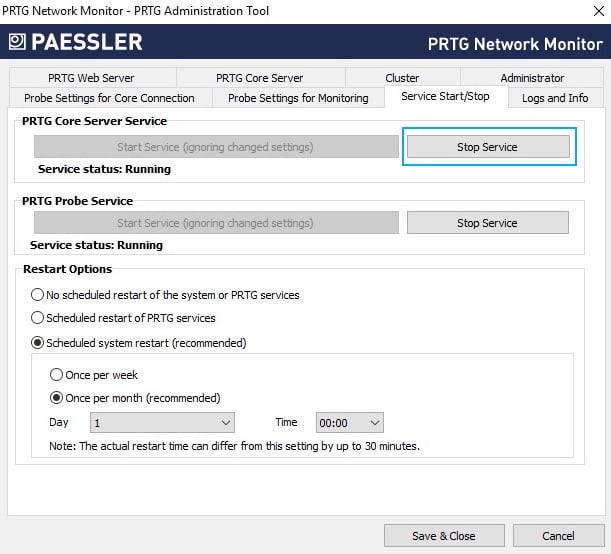
- Stop the PRTG core server service via the PRTG Administration Tool.
- Copy the three files into the \cert subfolder of the PRTG program directory.
- Restart the PRTG core server service via the PRTG Administration Tool.
Note: If you use remote probes, make sure that you copy the same certificate files to the \cert subfolder of the PRTG program directory on the remote probe system.
If PRTG does not start after you manually imported your own certificates, check if you can answer the following questions with Yes:
- Did you name all certificate files correctly?
- Are all certificate files in PEM-encoded format? Also check that the PEM-encoded files do not contain Unix line breaks because only Windows line breaks are supported.
- Did you decrypt the private key?
If answering these questions does not solve the issue, the fastest way to get PRTG up and running again is to copy the three default certificate files for PRTG back to the \cert subfolder of the PRTG program directory.
If you have no backup of the three default certificate files, delete the \cert subfolder completely and install PRTG over the existing installation.


